需求简介
最近厂里有一个新闻采集类的需求,细节大体如下:
- 模拟登录一个内网网站(SSO)
- 抓取新闻(支持代理服务器的方式访问)
- 加工内容样式,以适配手机屏幕
- 将正文中的图片转存到自已的服务器,并替换
![]() 标签中的url
标签中的url
- 图片存储服务器需要复用已有的FastDFS分布式文件系统
- 采集结果导入生产库
- 支持日志打印
初学Python3,正好用这个需求练练手,最后很惊讶的是只用200多行代码就实现了,如果换成Java的话大概需要1200行吧。果然应了那句老话:人生苦短,我用Python
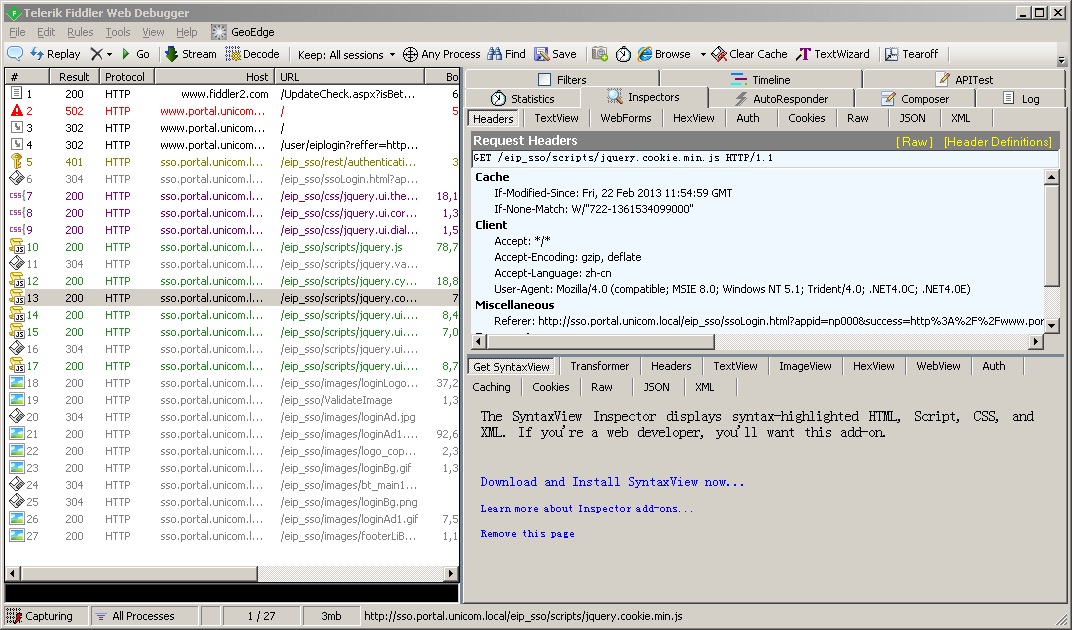
登录页面抓包
第一步当然是抓包,然后再根据抓到的内容,模拟进行HTTP请求。
常用的抓包工具,有Mac下的Charles和Windows下的Fiddler。
它们的原理都是在本机开一个HTTP或SOCKS代理服务器端口,然后将浏览器的代理服务器设置成这个端口,这样浏览器中所有的HTTP请求都会先经过抓包工具记录下来了。
这里推荐尽量使用Fiddler,原因是Charles对于cookie的展示是有bug的,举个例子,真实情况:请求A返回了LtpaToken这个cookie,请求B中返回了sid这个cookie。但在Charles中的展示是:请求A中已经同时返回了LtpaToken和sid两个cookie,这就很容易误导人了。
另外Fiddler现在已经有了Linux的Beta版本,貌似是用类似wine的方式实现的。
如果网站使用了单点登录,可能会涉及到手工生成cookie。所以不仅需要分析每一条HTTP请求的request和response,以及带回来的cookie,还要对页面中的javascript进行分析,看一下是如何生成cookie的。
模拟登录
将页面分析完毕之后,就可以进行模拟HTTP请求了。
这里有两个非常好用的第三方库, request 和 BeautifulSoup
requests 库是用来代替urllib的,可以非常人性化的的生成HTTP请求,模拟session以及伪造cookie更是方便。
BeautifulSoup 用来代替re模块,进行HTML内容解析,可以用tag, class, id来定位想要提取的内容,也支持正则表达式等。
具体的使用方式直接看官方文档就可以了,写的非常详细,这里直接给出地址:
requests官方文档
BeautifulSoup官方文档
通过pip3来安装这两个模块:
1
2
3
| sudo apt-get install python3-pip
sudo pip3 install requests
sudo pip3 install beautifulsoup4
|
导入模块:
1
2
| import requests
from bs4 import BeautifulSoup
|
模拟登录:
1
2
3
4
5
6
7
8
9
10
11
12
13
14
15
16
17
18
19
20
21
22
23
24
| def sso_login():
# 调用单点登录工号认证页面
response = session.post(const.SSO_URL,
data={'login': const.LOGIN_USERNAME, 'password': const.LOGIN_PASSWORD, 'appid': 'np000'})
# 分析页面,取token及ltpa
soup = BeautifulSoup(response.text, 'html.parser')
token = soup.form.input.get('value')
ltpa = soup.form.input.input.input.get('value')
ltpa_value = ltpa.split(';')[0].split('=', 1)[1]
# 手工设置Cookie
session.cookies.set('LtpaToken', ltpa_value, domain='unicom.local', path='/')
# 调用云门户登录页面(2次)
payload = {'token': token}
session.post(const.LOGIN_URL, data=payload, proxies=const.PROXIES)
response = session.post(const.LOGIN_URL, data=payload, proxies=const.PROXIES)
if response.text == "success":
logging.info("登录成功")
return True
else:
logging.info("登录失败")
return False
|
这里用到了BeautifulSoup进行HTML解析,取出页面中的token、ltpa等字段。
然后使用session.cookies.set伪造了一个cookie,注意其中的domain参数,设置成1级域名。
然后用这个session,去调用网站页面,换回sid这个token。并可以根据页面的返回信息,来简单判断一下成功还是失败。
列表页面抓取
登录成功之后,接下来的列表页面抓取就要简单的多了,不考虑分页的话,直接取一个list出来遍历即可。
1
2
3
4
5
6
7
8
9
10
11
| def capture_list(list_url):
response = session.get(list_url, proxies=const.PROXIES)
response.encoding = "UTF-8"
soup = BeautifulSoup(response.text, 'html.parser')
news_list = soup.find('div', 'xinwen_list').find_all('a')
news_list.reverse()
logging.info("开始采集")
for news_archor in news_list:
news_cid = news_archor.attrs['href'].split('=')[1]
capture_content(news_cid)
logging.info("结束采集")
|
这里使用了response.encoding = "UTF-8"来手工解决乱码问题。
新联页面抓取
新闻页面抓取,涉及到插临时表,这里没有使用每三方库,直接用SQL方式插入。
其中涉及到样式处理与图片转存,另写一个模块pconvert来实现。
1
2
3
4
5
6
7
8
9
10
11
12
13
14
15
16
17
18
19
20
21
22
23
24
25
26
27
28
29
30
31
32
33
| def capture_content(news_cid):
# 建立DB连接
conn = mysql.connector.connect(user=const.DB_USERNAME, password=const.DB_PASSWORD, host=const.DB_HOST,
port=const.DB_PORT, database=const.DB_DATABASE)
cursor = conn.cursor()
# 判断是否已存在
cursor.execute('select count(*) from material_prepare where news_cid = %s', (news_cid,))
news_count = cursor.fetchone()[0]
if news_count > 0:
logging.info("采集" + news_cid + ':已存在')
else:
logging.info("采集" + news_cid + ':新增')
news_url = const.NEWS_BASE_URL + news_cid
response = session.post(news_url, proxies=const.PROXIES)
response.encoding = "UTF-8"
soup = BeautifulSoup(response.text, 'html.parser')
# logging.info(soup)
news_title = soup.h3.text.strip()[:64]
news_brief = soup.find('div', 'brief').p.text.strip()[:100]
news_author = soup.h5.span.a.text.strip()[:100]
news_content = soup.find('table', 'unis_detail_content').tr.td.prettify()[66:-7].strip()
# 样式处理
news_content = pconvert.convert_style(news_content)
# 将图片转存至DFS并替换URL
news_content = pconvert.convert_img(news_content)
# 入表
cursor.execute(
'INSERT INTO material_prepare (news_cid, title, author, summary, content, add_time, status) VALUES (%s, %s, %s, %s, %s, now(), "0")'
, [news_cid, news_title, news_author, news_brief, news_content])
# 提交
conn.commit()
cursor.close()
|
样式处理
文本样式处理,还是要用到BeautifulSoup,因为原始站点上的新闻内容样式是五花八门的,根据实际情况,一边写一个test函数来生成文本,一边在浏览器上慢慢调试。
1
2
3
4
5
6
7
8
9
| def convert_style(rawtext):
newtext = '<div style="margin-left: 0px; margin-right:0px; letter-spacing: 1px; word-spacing:2px;line-height: 1.7em; font-size:18px;text-align:justify; text-justify:inter-ideograph">' \
+ rawtext + '</div>'
newtext = newtext.replace(' align="center"', '')
soup = BeautifulSoup(newtext, 'html.parser')
img_tags = soup.find_all("img")
for img_tag in img_tags:
del img_tag.parent['style']
return soup.prettify()
|
图片转存至DFS
因为原始站点是在内网中的,采集下来的HTML中,![]() 标签的地址是内网地址,所以在公网中是展现不出来的,需要将图片转存,并用新的URL替换原有的URL。
标签的地址是内网地址,所以在公网中是展现不出来的,需要将图片转存,并用新的URL替换原有的URL。
1
2
3
4
5
6
7
8
9
| def convert_img(rawtext):
soup = BeautifulSoup(rawtext, 'html.parser')
img_tags = soup.find_all("img")
for img_tag in img_tags:
raw_img_url = img_tag['src']
dfs_img_url = convert_url(raw_img_url)
img_tag['src'] = dfs_img_url
del img_tag['style']
return soup.prettify()
|
图片转存最简单的方式是保存成本地的文件,然后再通过nginx或httpd服务将图片开放出去:
1
2
3
4
| pic_name = raw_img_url.split('/')[-1]
pic_path = TMP_PATH + '/' + pic_name
with open(pic_path, 'wb') as pic_file:
pic_file.write(pic_content)
|
但这里我们需要复用已有的FastDFS分布式文件系统,要用到它的一个客户端的库fdfs_client-py
fdfs_client-py不能直接使用pip3安装,需要直接使用一个python3版的源码,并手工修改其中代码。操作过程如下:
1
2
3
4
5
6
7
| git clone https://github.com/jefforeilly/fdfs_client-py.git
cd dfs_client-py
vi ./fdfs_client/storage_client.py
将第12行 from fdfs_client.sendfile import * 注释掉
python3 setup.py install
sudo pip3 install mutagen
|
客户端的使用上没有什么特别的,直接调用upload_by_buffer,传一个图片的buffer进去就可以了,成功后会返回自动生成的文件名。
1
2
3
4
5
6
7
8
9
| from fdfs_client.client import *
dfs_client = Fdfs_client('conf/dfs.conf')
def convert_url(raw_img_url):
response = requests.get(raw_img_url, proxies=const.PROXIES)
pic_buffer = response.content
pic_ext = raw_img_url.split('.')[-1]
response = dfs_client.upload_by_buffer(pic_buffer, pic_ext)
dfs_img_url = const.DFS_BASE_URL + '/' + response['Remote file_id']
return dfs_img_url
|
其中dfs.conf文件中,主要就是配置一下 tracker_server
日志处理
这里使用配置文件的方式处理日志,类似JAVA中的log4j吧,首先新建一个log.conf:
1
2
3
4
5
6
7
8
9
10
11
12
13
14
15
16
17
18
19
20
21
22
23
24
25
26
27
| [loggers]
keys=root
[handlers]
keys=stream_handler,file_handler
[formatters]
keys=formatter
[logger_root]
level=DEBUG
handlers=stream_handler,file_handler
[handler_stream_handler]
class=StreamHandler
level=DEBUG
formatter=formatter
args=(sys.stderr,)
[handler_file_handler]
class=FileHandler
level=DEBUG
formatter=formatter
args=('logs/pspider.log','a','utf8')
[formatter_formatter]
format=%(asctime)s %(name)-12s %(levelname)-8s %(message)s
|
这里通过配置handlers,可以同时将日志打印到stderr和文件。
注意args=('logs/pspider.log','a','utf8') 这一行,用来解决文本文件中的中文乱码问题。
日志初始化:
1
2
3
4
| import logging
from logging.config import fileConfig
fileConfig('conf/log.conf')
|
日志打印:
完整源码
到此为止,就是如何用Python3写一个爬虫的全部过程了。
采集不同的站点,肯定是要有不同的处理,但方法都是大同小异。
最后,将源码做了部分裁剪,分享在了GitHub上。
https://github.com/xiiiblue/pspider
最后,将源码做了部分裁剪,分享在了GitLab上。
http://git.si-tech.com.cn/guolei/pspider